Widget Integration
A complete guide to installing the Everledger Widget onto your website.
Welcome to the Everledger widget installation page.
The provenance widget is pluggable javascript code
to display the journey of your asset. Created in React
with the Preact library
How to Install the Everledger Widget on a Retailers Site.
How to Install the Widget
1. Upload the ‘/build’ folder to a public s3 bucket.
a. Select a webpage to inject the widget javascript code.
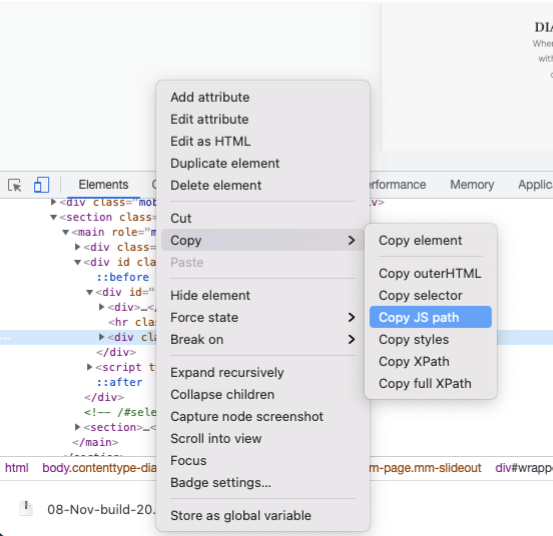
b. Inspect and ‘copy js path’ by right-clicking on the element and selecting the option to copy js path for the `<div>…</div>, where we want to inject our widget.
					```nodejs
    function loadjscssfile(filename){
        var fileref=document.createElement('script')
        fileref.setAttribute("type","text/javascript")
        fileref.setAttribute("src", filename)
        fileref.setAttribute('async', true)
        if (typeof fileref!="undefined")
            document.getElementsByTagName("head")[0].appendChild(fileref)
    }
    var container = document.querySelector("<js selector as displayed in the `copy-js-path` in step b. >")
```
d. Finally run the below code to load the ‘bundle.js’ file from AWS s3 and load the widget.
					```node
      container.innerHTML += `<div data-widget-host="habitat" data-prop-certificate-id='1358887854' class="preview"></div>`;
      loadjscssfile("<s3-bucket-url>/<<path where build folder is hosted in s3 bucket>>/bundle.js")
```
reference to the build folder path: <s3-bucket-url>/assets-and-icons/build/bundle.js
The `data-prop-cer cate-id=’1358887854’` contains the id of the asset, which provenance is ge ng displayed by the widget.
3. Adding the widget code to the webpage.
a. Load the ‘bundle.js’ file in the webpage, which we can load directly from the s3 bucket.
b. Add the following ‘<div>’ in the code.
					```HTML
<div data-widget-host=”habitat” data-prop-cer  cate-id=’1358887854’ class= ”preview”></div>
```
Steps to Test the Widget
Here’s what you can do to test the widget
1. Select a space on your diamond detail page to insert the Widget (In Technical terms it’s a div) by doing Right click—> Inspect—> Elements. Screenshot below and copy JS path of div like below
2. Once you have a JS path, replace the JS path below on the field ‘var container’ on below code, I have given code below.
					function loadjscssfile(filename){

var fileref=document.createElement('script')

fileref.setAttribute("type","text/javascript")

fileref.setAttribute("src", filename)

fileref.setAttribute('async', true)

if (typeof fileref!="undefined")

document.getElementsByTagName("head")[0].appendChild(fileref)

}

var container = document.querySelector("#single > div:nth-child(1)")

container.innerHTML += `<div data-widget-host="habitat"

data-prop-certificate-id='7378986165' class="preview"></div>`;

loadjscssfile("https://js.everledger.io/assets-and-icons/dcnz-build-v1/bundle.js")
3. Once you have replaced JSPath, use the above code and add the code on Right click —> Inspect —> Console. Press enter after done, it will bring in widget
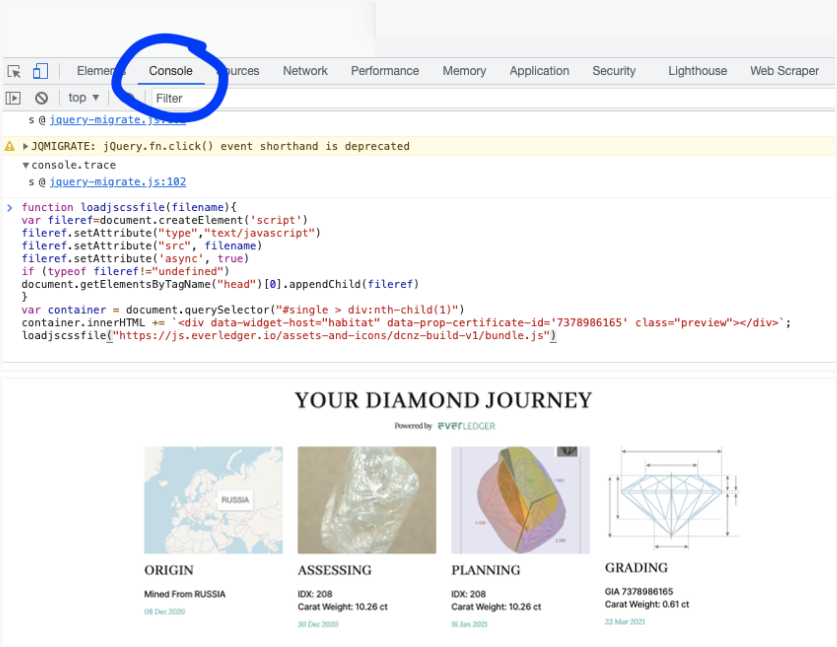
Info: This fled takes cert#s, so, you can replace the cert# and test for your own stones, if we have them in our test database, you will get a widget for your own stone.
data-prop-certificate-id=’7378986165′